Projectitis: Kitchen Pantry Cabinet Storage

This is probably not as big of a deal to you as it is to me. Because you probably have a lot of cabinet space in your house. Or maybe you have a whole walk-in space that stores all your kitchen stuff.

Well, turns out 119 year old houses do not have such a thing unless you create them yourself. If you have one of these house, you know what I’m talking about.

When we moved in, the previous owners over the years did a gut-rehab to the place, but they did a crap job for many reasons including…

#1- They didn’t build a surplus of downstairs cabinets, storage or closet space. It’s quite possible that we have more “stuff” than the average person and that’s why we noticed, but that’s besides the point.

#2- They didn’t restore the house to reflect ANYTHING resembling the charm of a Victorian Farmhouse. Nicole Curtis from Rehab Addict would be freaking out if she saw what they did to my house (Drop ceiling– in a kitchen??? For the love of…WHY?). It was home restoration sacrilege.

Basically, I’m left with a house that I don’t want to put a ton of money into, but I still want to made modifications to so that I can love living here. So I was on a mission for a kitchen pantry cabinet.

For years, we’d been using this Mexican Pine Armoire to store our stuff and it served us well. It was a clever way to store a lot, including a microwave. I put in baskets and dish separators to organize and it was a good use of the furniture while it lasted.
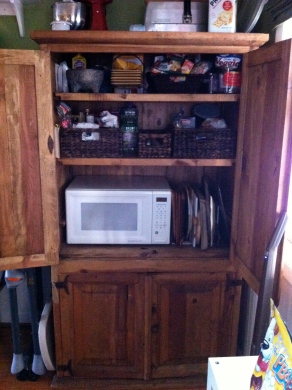
Mexican Pine Cabinet
Used a Mexican pine media storage cabinet for our food. It was fun for a while. Adios!

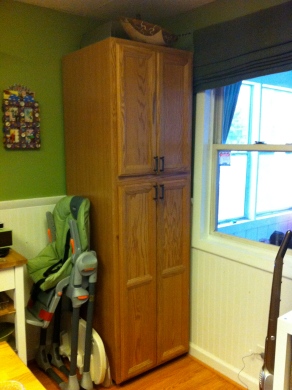
Our kitchen isn’t small; it’s a medium size— nothing compared to how they build kitchens with new construction. I wanted a new cabinet that was created FOR a kitchen; something that was skinnier and taller. I’ve been watching Craigslist like a hawk and I finally scored a brand new cabinet for $50 that worked with the space. Rolling shelves store all our food and containers, plus space above for our microwave. Always feels good to make small changes that give us a little more room to walk around. When you have a small room, the key is to have tall furniture so that you can store up, rather than fat furniture that takes up too much horizontal space.
Image
$50 for a new storage solution=Carmamma happy

Sliding Doors on a Budget

I searched online and in store for hardware materials to make those sliding barn doors that I love on Pinterest and couldn’t find anything that I could

The track hardware was created for under $20!

justify spending on my house. $300 or more for hardware seemed very excessive, right? Unless you are in an architecturally beautiful home or are designing a hotel. I’m in a 119 year old Victorian Farm House “starter”, so that seems a little high, considering I needed a quick and easy, but attractive solution for our office nook.

But I’ll be honest, I came very close to buying them, until my father in law came to the rescue and came up with a solution.

Here’s how you can create this sliding barn door for your home, for less than $30

  • Two garage door rollers hardware- $3.79 each.
  • Two mending plates @ $1.79 each.
  • One 6 foot shelf bracket for rail…$9.79

A $300 (or more) sliding door hardware project completed for $20.95

This price does not include the door and handle. However, he created this Faux Barn door by using an old brown standard door that was stored in our garage, covered it in wainscoting +  trim and painted it white to make it look like a barn door. To recover the door was probably $8 or so? If you have scraps around your house like he did (and a handy person around), it’s basically free.

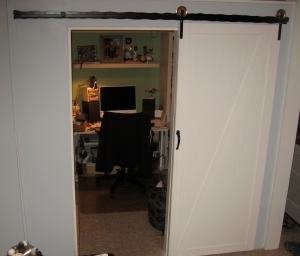
sliding barn door office hardware materials
Open Sesame! Our Office Door and Hardware

Projectitus: The Office Nook Extended Remix

After the New Year, we realized that working out of the corner of Abby’s room was, well…not working out. The problem with houses that are over 100 years old (at least ours) doesn’t lend itself to a lot of bonus rooms like closets, crafts, caves for men, exercise studios and home offices. You pretty much have to make the space with an addition or multi-purpose rooms, which is basically what we were doing with my daughter’s room. It was her sleeping quarters at night and my workspace during the day.

Ken made the call and suggested that I move somewhere else in the house to work. I laughed. There was NO where on the first floor that wouldn’t be exposing me to the kids during the day. I could just picture them climbing on the back of my chair, beating me with dolls while I was on an conference call.

All the bedrooms upstairs are taken. The basement is too hazmat and the back porch only serves us during 3 Seasons. Seemed like a dead-end idea for about 3 minutes. Then we came up with a little outside the box idea that ended up working really well.

You remember the Office Nook we set up for the family computer last year? It’s pretty exposed and right off the family room’s open concept.

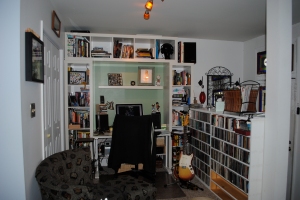
Office Nook 2012
The adult office area

In order for me to have office space, we had to get some creative thinking going, which meant, we’d have to put a wall up. The biggest challenge was that the house is “skinny” (narrow), so putting in a swing door would have eaten up too much space. A pocket door seemed a little too involved. I’d been salivating on Pinterest looking at pictures of those “Sliding Barn” doors, but the hardware was WAY out of our budget. To put in a track, wheels and all the right stuff sells for $300 or more. Why does my taste always have to be so expensive??

We shared our idea with my Father in Law. Have you met Russ? He’s the magic sorcerer behind many of my home project ideas and not only can help us dream up these wild and crazy schemes, but he loves to figure out how to do things in a tasteful, but inexpensive way.

IMG_1943
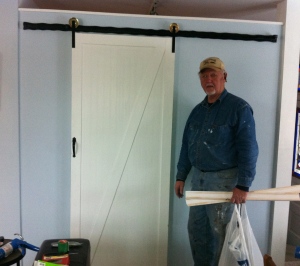
My Father in Law. Not for sale.

Russ installed a wall to separate the space. As for the sliding door here? He took an old brown, dusty door that the previous owners stored in the rafters of our garage, painted it white and added the wainscoting and the trim to make it look like a barn door. He also figured out what pieces of hardware were needed to make the sliding functionality.

And guess what? It didn’t cost us $300 for the hardware. He figured out how to make the track and it’s parts for UNDER $20 using materials you can get at Home Depot or Menards. And it works just as good for our needs as the fancy ones we’ve seen. I’m so happy how it turned out and how we were able to make use of old door in the garage too.

The track hardware was created for under $20!


What’s behind Door #1?

DSC_0617
An Office Nook within the Nook…

With a little imagination and flexibility, it came together.

Rain Rain, Come and Stay!

I love a rainy weekend. It’s a perfect excuse to do a little baking, catch up on indoor projects or kick back and do nothing at all.

Image


This morning was a great warm fall morning, so we went for a long walk in our neighborhood. About 10 minutes after we took a detour to enjoy some more houses and Halloween decorations, it started to downpour.

And pour some more.

We were about 1.5 miles from home, but schlupped back in the rain. The kids dry as a bone under the BOB stroller, but it didn’t stop Abby from berating us to get home quickly because she didn’t like the rain. The abuse we take as parents.

It was kind of a fun experience. I really don’t mind the rain.

It’s a perfect day to make something in the crock pot (we chose chili) organize a closet or two, maybe catch up on some other to-dos, but then sit back and read a book.

That is, if your children allow you to do that. Mine do not.

When you’re rained in, you clearly know the importance to keep them occupied, otherwise they just get into a bunch of trouble and there’s LOTS of crying and whining. Make sure you have a rainy day game plan with stuff/ideas hey haven’t seen before and get them involved for a couple hours. After a while, there’s no shame in sitting them in front of the TV if it buys you some time to get your own projects done.

RAINY DAY BOX (of IDEAS)

  1. Artist time- Grab your paints, paper, markers, crayons, glitter…whatever you need and clear the kitchen table to be creative. You should do it too. Coloring and drawing is quite relaxing.
  2. Play Dough – if you’re feeling crafty, you can make it yourself. I used to eat it when I was kid and turned out pretty decent.
  3. Hole puncher- make some confetti and sprinkle on paper with glue
  4. Kids LOVE to help (if you catch them at the right time of the day), so bake something and let the kids frost the muffins, cookies or whatever’s in your oven.
  5. If it’s Fall, you can pick up some pumpkins and decorate them with markers and stickers
  6. What about a Tea Party? I really like this set because you can use it for both boys and girls.

    Dhall-ing…Get out your best Brittish accent and have some tea and crumpets
  7. Make a cardboard box fort or other awesome projects
  8. Rain boots- during bouts of no rain, go puddle jumping. Don’t always let the weather keep you indoors.
  9. Dress up! Abby has a box of all kinds of princess dresses, tiaras and necklaces and can play for hours.
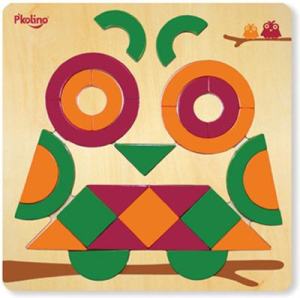
  10. Puzzles are so much fun. I can’t wait until my kids are old enough to tackle a 500+ piece one! In the meantime, these puzzles from P’kolino are creative and fun.
owl puzzle, P'kolino
Whoooo’s up for Puzzles?


Well, those are my ideas. What kinds of things do you like to do with your kids on rainy/snowy days?

The Office Nook

We finally finished the Office Nook. Now we have separation between kid and parent.

Not really. Somehow, they are still finding their way into our space…

I’m thinking of painting the post to the right and the door trim the same color as the inner part of the office. Thoughts? I sometimes get carried away with paint color. Maybe it’s just fine as is.

Image

In other news, I have started doing some painting again. I did this one for the play cave for the kids. I call it the A & B Tree…

Image

Hodge Podge Room Turned Kid’s Play Cave- Revealed.

You remember how this all started, right? I entered a design makeover contest over at MakingItLovely, submitting my sob story of how I needed a this Modge Podge room to turn into a purposeful place for my kids. The contest found a lucky winner (not me) to have her Oak Park bedroom redecorated.  It forced me to put this into my own hands and give it a go.

One thing I’ve learned about having a full time job, two kids, a dog, two cats and general life going on— it’s really hard to get a project done in a short span of time. Unless you hire someone to do it*, which isn’t really my style. I like to do things on my own (with help from family members, of course) because I can be proud that I accomplished something. You’d think a project like this would not take very long, but without boring you with the details— we had to dismount and store away over 6,000 CDs from the wall, remove the shelving and then move a 208 lb. large Expedit shelf from Ikea from one side of the house to the other. The prep work alone took the most time.

This project’s infancy started in late January 2012 and finally, in May is near completion. I have a couple more things to install like the chalkboard/magnetic door and some more artwork, plus some home made curtains, but why wait?

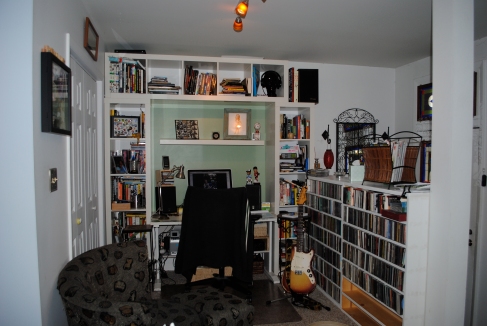
So here’s what the room looks like before.  It was our office/media room, with playroom elements to it. I wanted to make it 100% for the kids.

(But something that I’d enjoy looking at too, naturally.)

Pre-Play Cave.

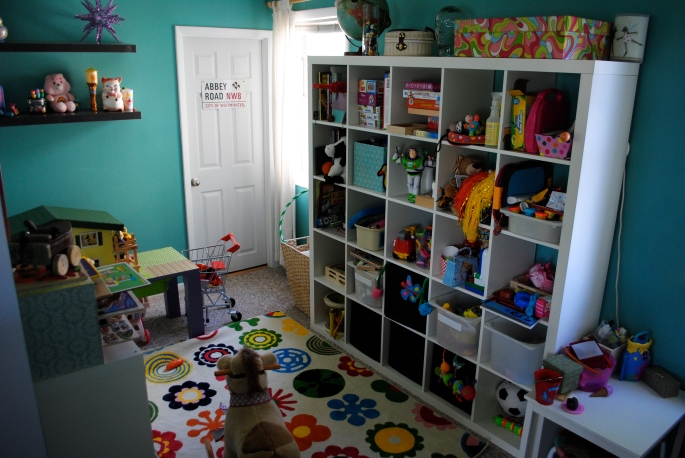
With a lot of inspiration from my head (and Pinterest), here’s the kids new Play Cave! My favorite part of this design is that we barely had to buy anything new. Just paint, a rug and two shelves. Everything else was brought up from our basement (lots of my treasures I had as a kid) and used as part of the design. I saved all my Smurfs, Cabbage Patch Kids, Care Bears and Pez Dispensers thinking that one day in my life, I wanted a pop culture room of sorts. Turned out, it was worth lugging them around for 20 years!

Ikea Expedit Shelfs
Ikea Expedit Shelfs are the best storage invention ever. This used to hold books. Now it holds all the kid loot.

This slideshow requires JavaScript.

Painted walls “Hummingbird Blue”- part of the Martha Stewart Collection. I had it made with Behr with Primer at Home Depot since that brand has not failed me yet and usually needs just one coat.

Cubbie Expedit Shelf ($199) from Ikea was something I already had in our house. It stored a TON of books, but now stores all the kids books and toys. Still working on organizing each section, but I’ll get there. Even when the kids get older and no longer need to store toys, this shelf can be used in countless ways. That’s why I love them so much.

The Lusy Blom rug is from Ikea and around $40. I loved the design on it. So fun and perfect for kids, but suitable for adult rooms too. I feel like they can grow with this design.

*I semi-lied when I said I did EVERYTHING by myself. I totally didn’t.

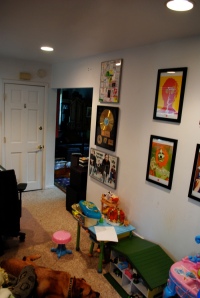
There is a huge thanks that I need to give to my Father in law. He’s a handy guy and painted this entire room in a matter of hours. He also help secure the shelves. Without him, this project could have gone a little longer than I wanted to. My husband also helped hang the Beatles prints  and shelves, but more important—-he made huge sacrifices by moving his CDs to the basement. Definitely a hard decision to make, but this room looks awesome for it. Shows his true fatherly love.